Set up GA4 On Shopify
Google Analytics Ecommerce Tracking is a powerful tool for online store owners and marketers. When properly set up, it allows you to track key performance metrics such as revenue, conversion rates, and more. In this article, we will show you how to set up Google Analytics Ecommerce Tracking for your Shopify store using Google Tag Manager and Google Ads. By the end of this guide, you will have a better understanding of how to use these tools to gain valuable insights into your store’s performance and make data-driven decisions to improve your marketing efforts.
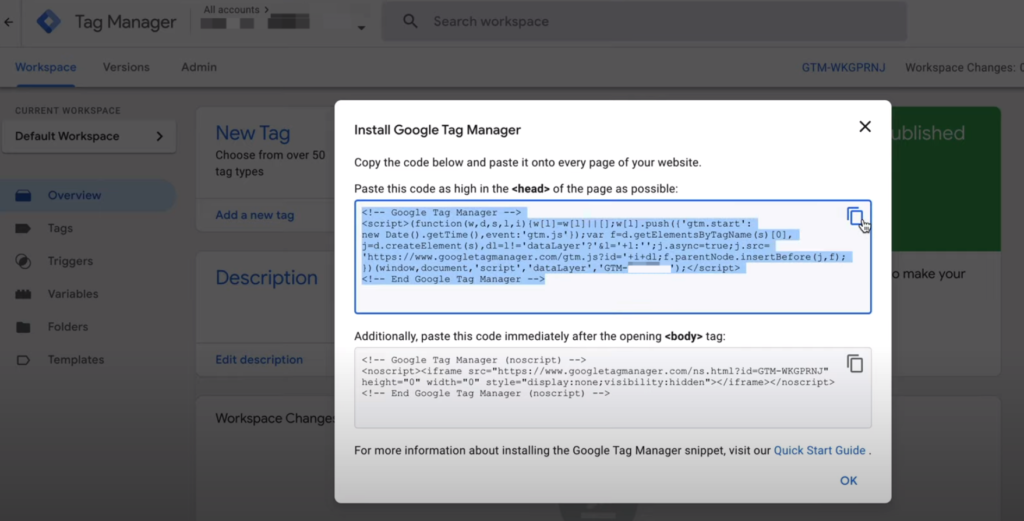
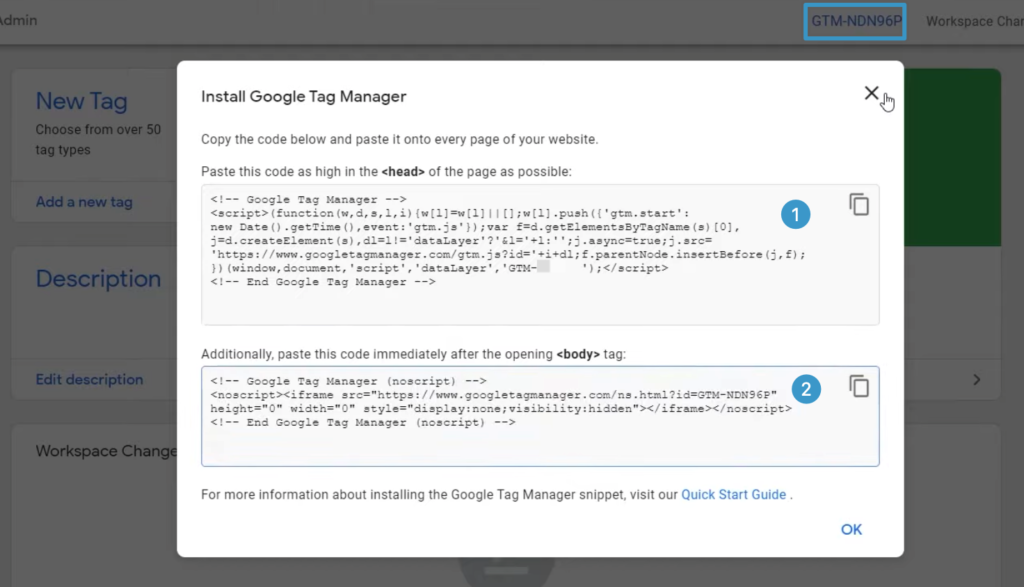
First you need to copy your Google Tag Manager container code to your Shopify store.
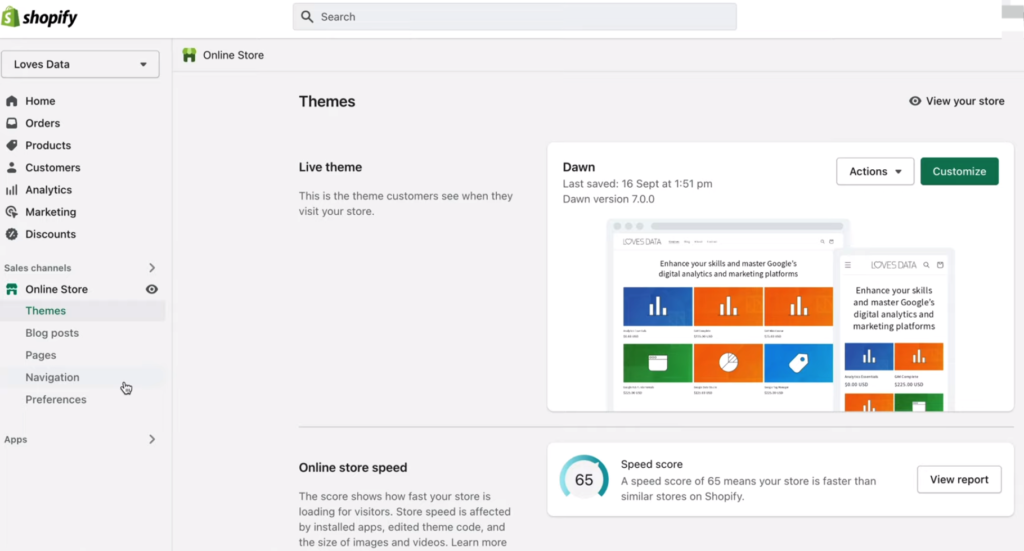
Next, open your Shopify store. Choose “Themes” on the side menu.
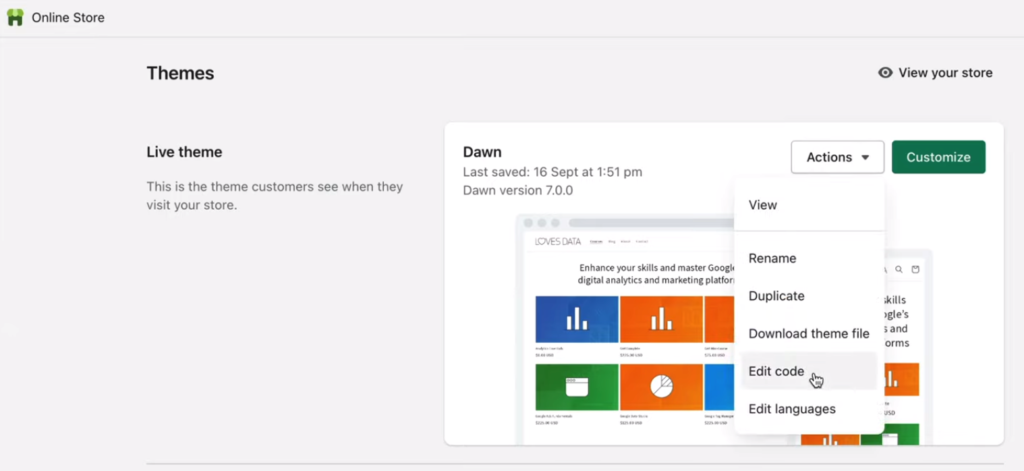
Click “Action”, then click “Edit code”.
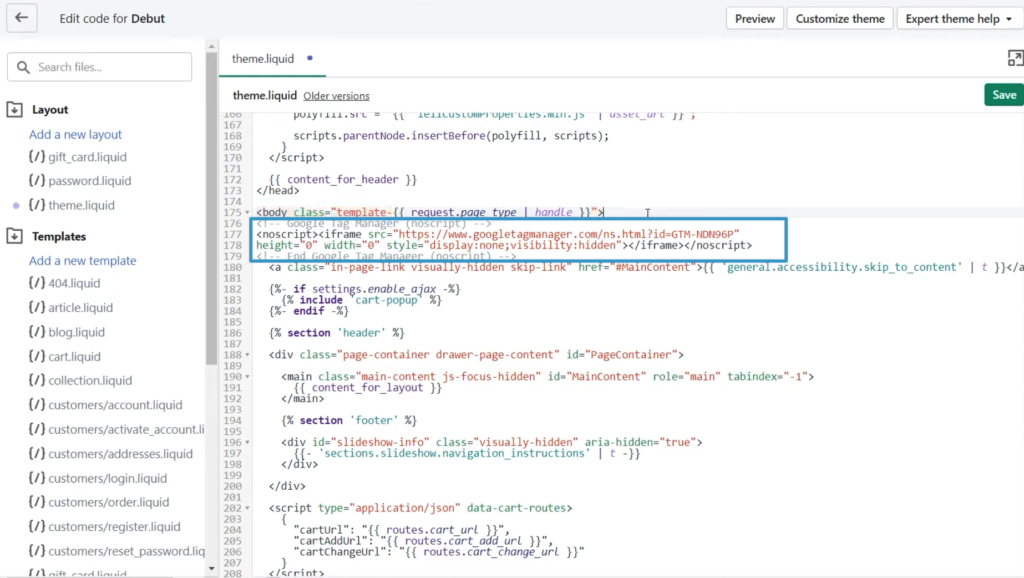
Open the theme.liquid file, then add the code after tag.
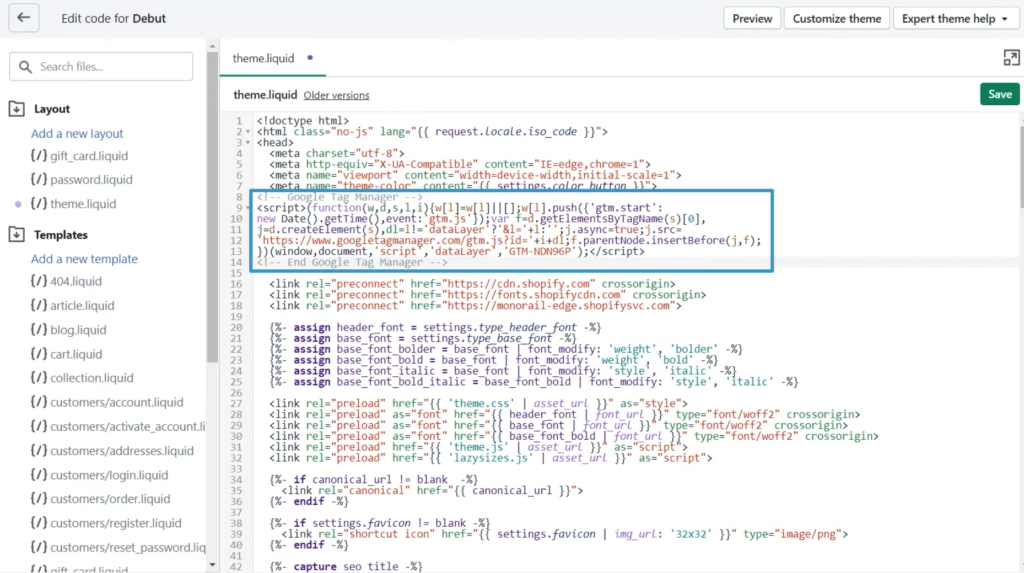
Then keep scrolling until you find tag, paste the second Google Tag Manager code after the tag.
Now we have added Google Tag Manager to the pages of our Shopify store, including the category pages, product pages, and the cart. If you’re using Shopify Plus, you should also add Google Tag Manager to the “checkout.liquid” file. But unfortunely if you don’t have Shopify Plus account, you can’t use Gogole Tag Manager to track the check out page.
So the next thing we need to do is add Google Tag Manager to the order confirmation page.
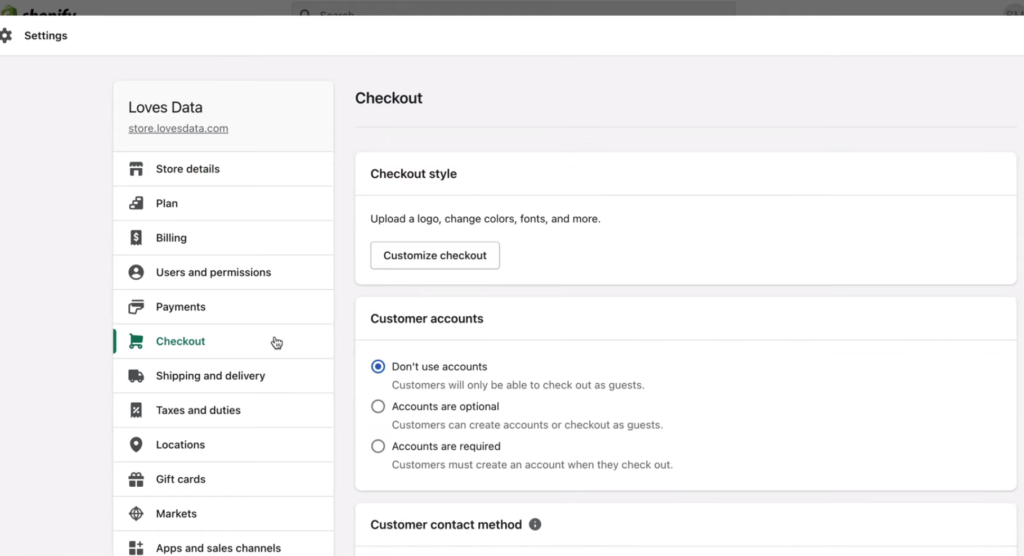
Head to “Setting” on Shopify site, then click “checkout”, now you need to scroll down and look for “Order Status Page”.
Here allows you to add tracking code to the order confirmation page after someone has completed their purchase. Let’s paste both Google Tag Manager code under ‘Additional Scripts’, then click “Save”.
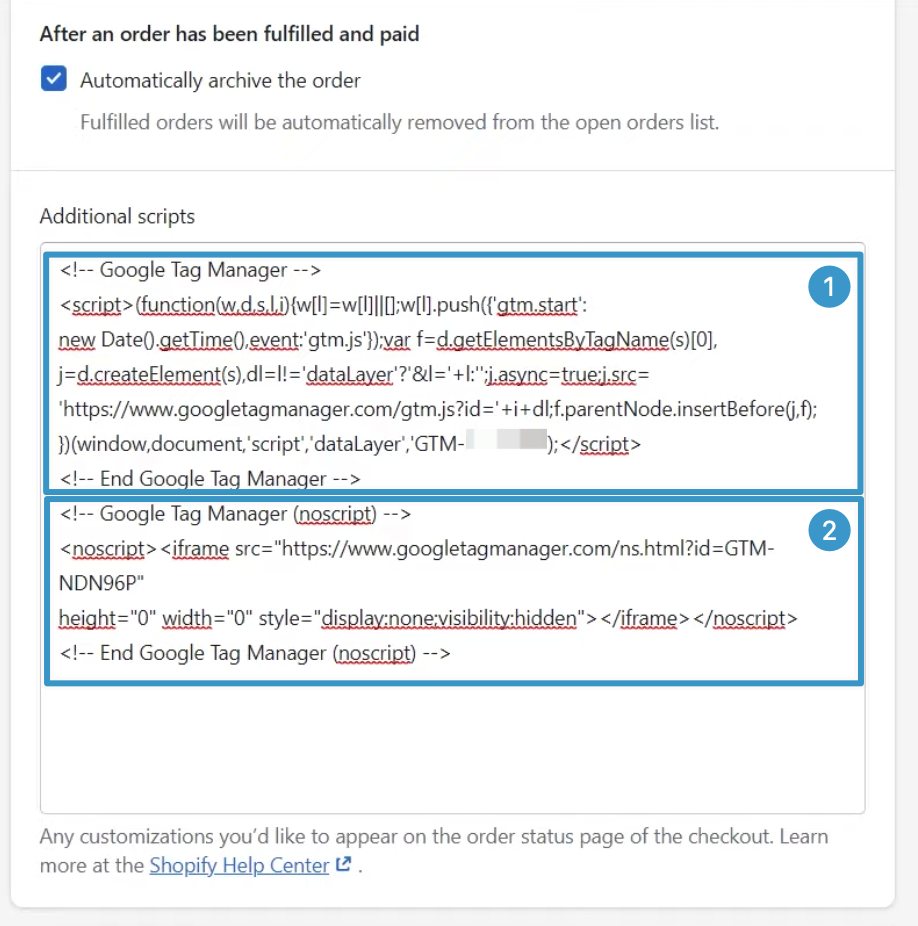
(code you can get from Google Tag Manager)
Create new GA4 Tag on Google Tag Manager
Now let’s install our first tag with Google Tag Manager, and this will be the new Google Analytics 4 tag.
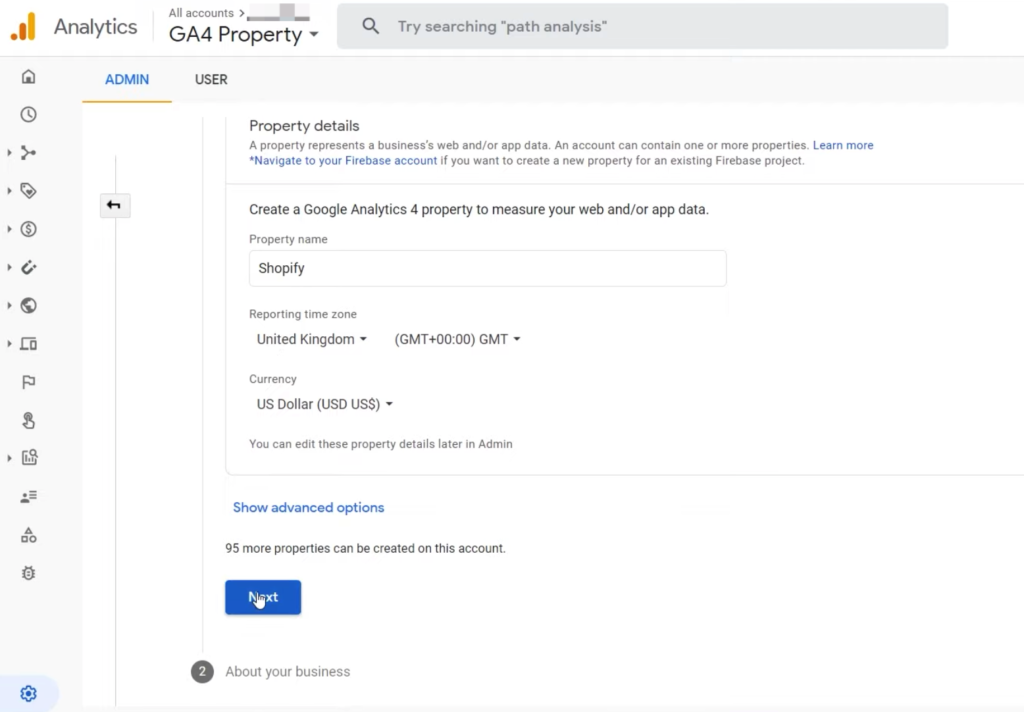
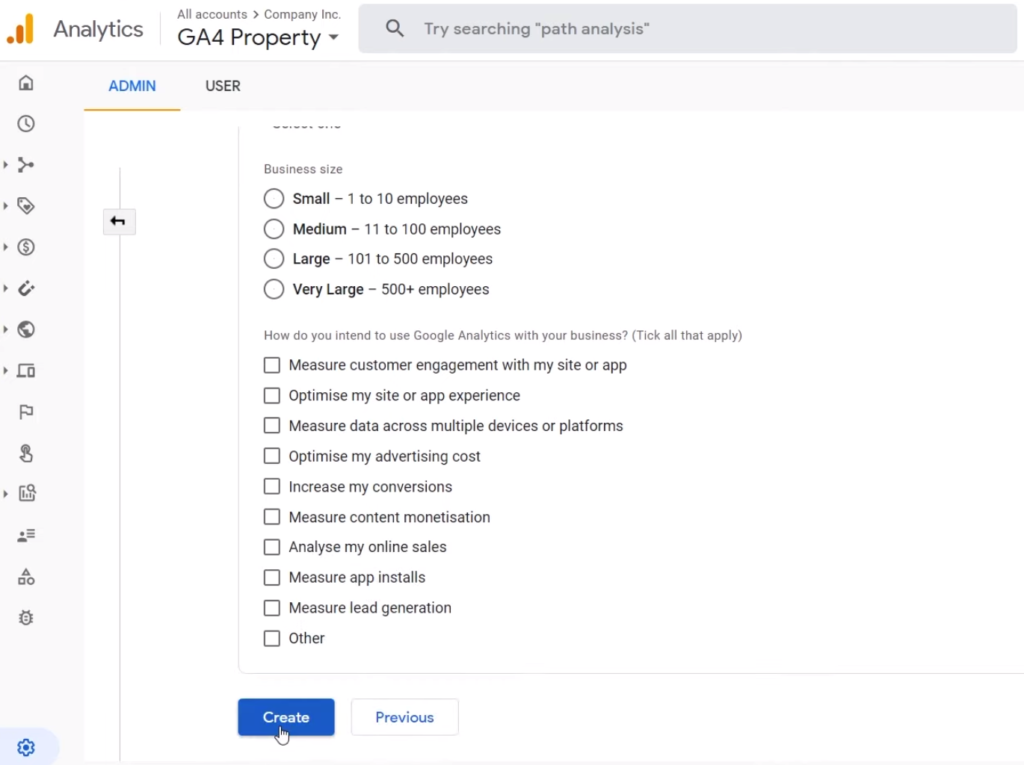
Then click “Create”.
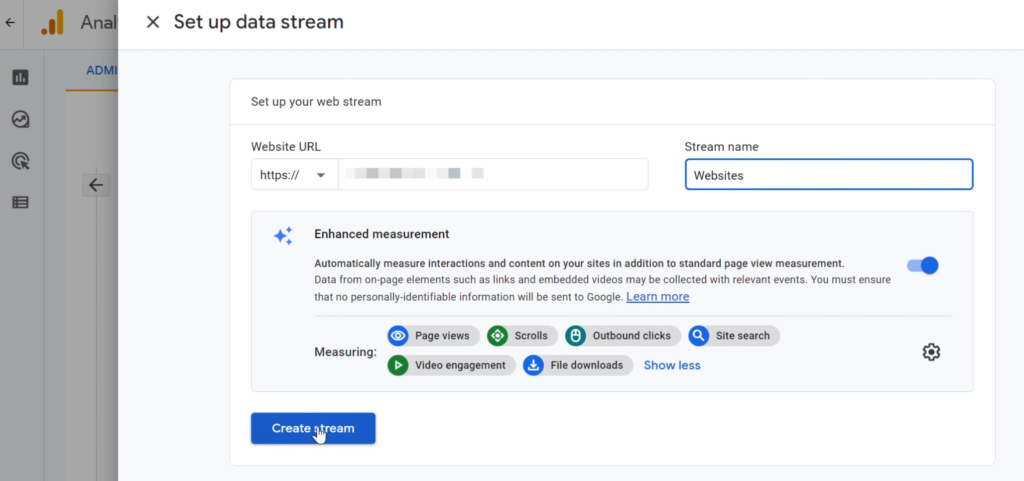
Please notice that Enhance measurement in Google Analytics 4 will automatically track certain things, for example, page views, scrolls, etc. In most cases, you can simply leave them checked, then click “Create Stream”.
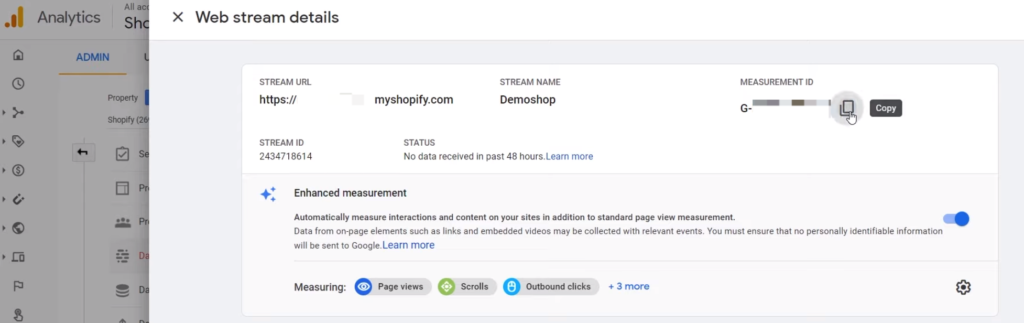
It might takes a few seconds before Google Analytics 4 shows you the measurement ID which we need to copy to Google Tag Manager.
Now let’s jump to Google Tag Manger to create a new GA4 Tag, then simply embed the measurement ID into it.
Choose “Google Analytics: GA4 Configuration” as tag type.
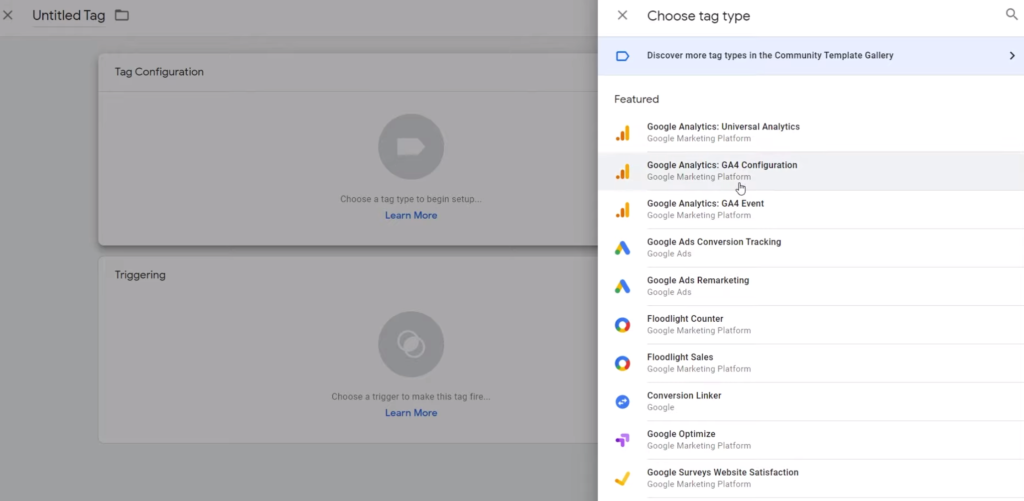
Then connect it to a trigger. Choose “All Pages” trigger.
Set up Google Ads Conversion Tracking (with Google Tag Manager)
Next, we’re going to take a look at how we can set up our tracking codes correctly inside of Google Tag Manager. So it enables you to do Google Ads, Dynamic Remarketing on your Google Ads campaigns all and more.

Please notice that there are two prerequisite for setting up dynamic marketing with Google Ads. The first one is that you need to have a product feed. A product feed could be a spreadsheet that contains data for all of your products. You can use the Google Merchant Center for directly uploading your feed there. Then, you can simply link your Merchant Center account to your Ads account to maintain an up-to-date product feed.
Secondly you need to set up dynamic remarketing is to add Data Layer Tags to your website.

Data Layer Tags enable us to identify which product a user saw on our website. The Tags then send this data over to Google Ads, which will pull the relevant product information from our product feed. Then, Google Ads can use this product information in dynamic ads and display them on our website.
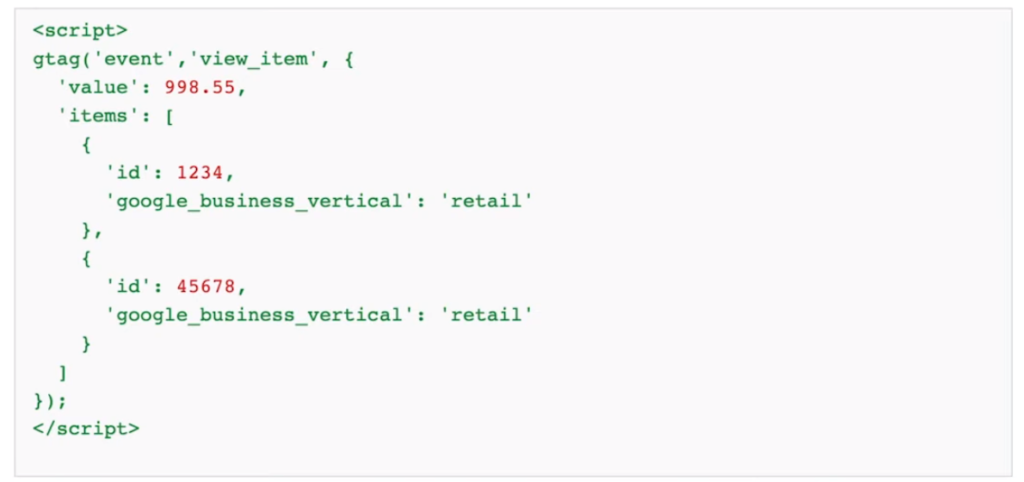
Data Layer Example:
In the following example, a user viewed two products, the event snippet code will contain the value (price) and the IDs of the products viewed.
Install Data Layer Tags
The simplest method is to use a plugin. If you’re using popular eCommerce stores like Shopify, you can just install a plugin that will implement the code for you. But if there aren’t any plugins available for your store, you may have to manually install codes on your website with the help of Google documentation. With a manual installation via Google Tag Manager, you’ll need to push the product’s value and ID to the Data Layer using a custom script.
Once the data layer tags have been installed correctly and verified, we can start to create Google Ads remarketing Tag in Google Tag Manager, so that we can transfer the information from the Data Layer into Google Ads.
Create Google Ads Remarketing Tag in Google Tag Manager
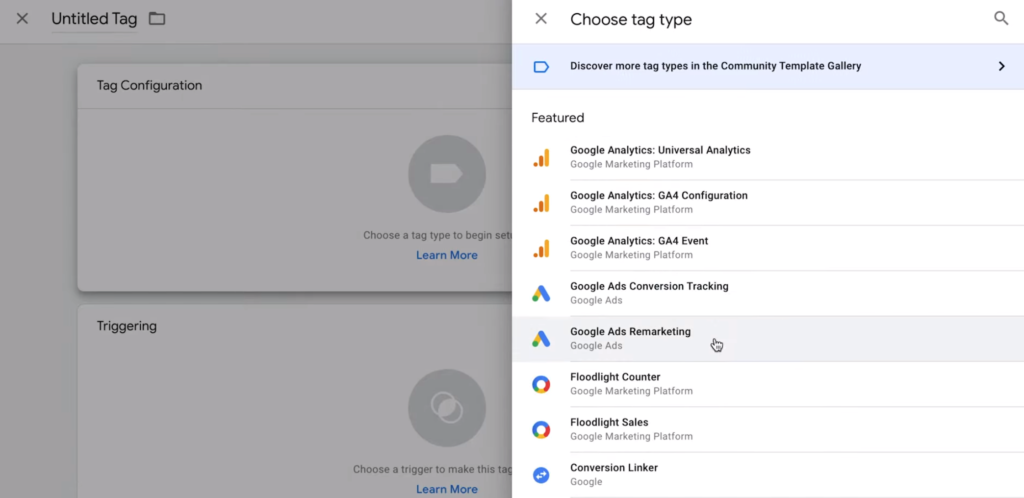
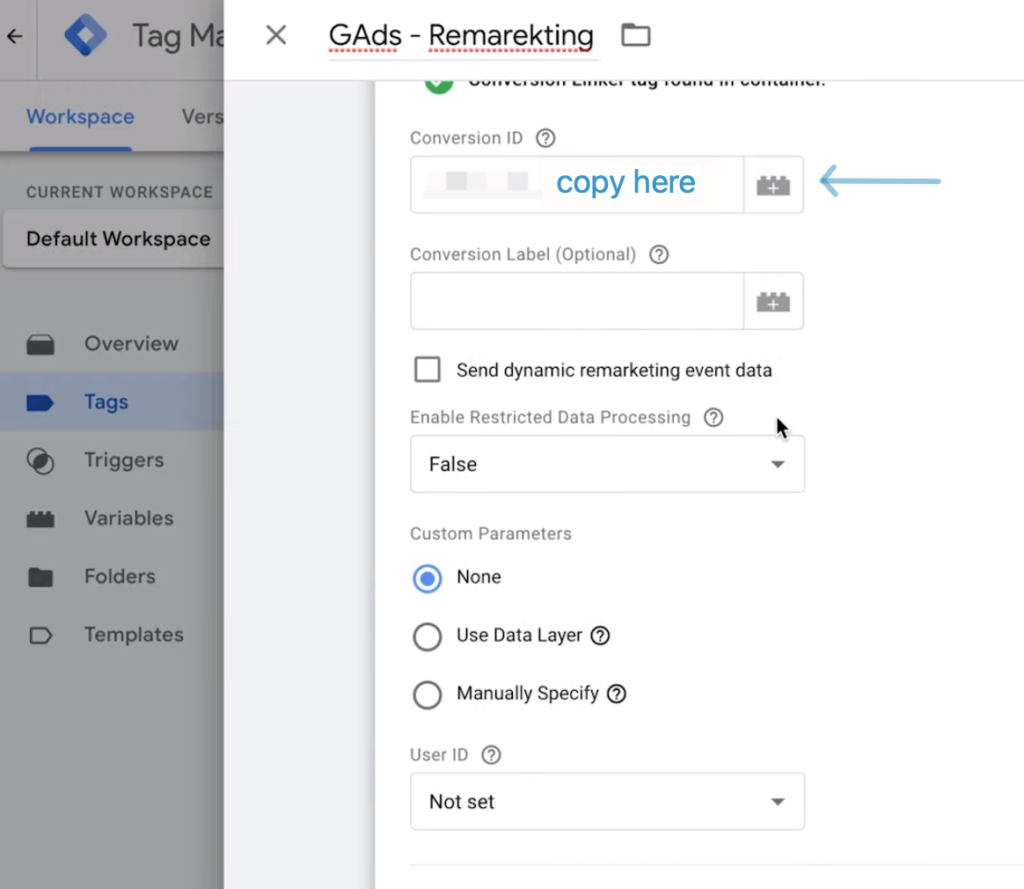
Open Google Tag Manager to create a new Tag. Select “Google Ads Remarketing” as the new tag type.
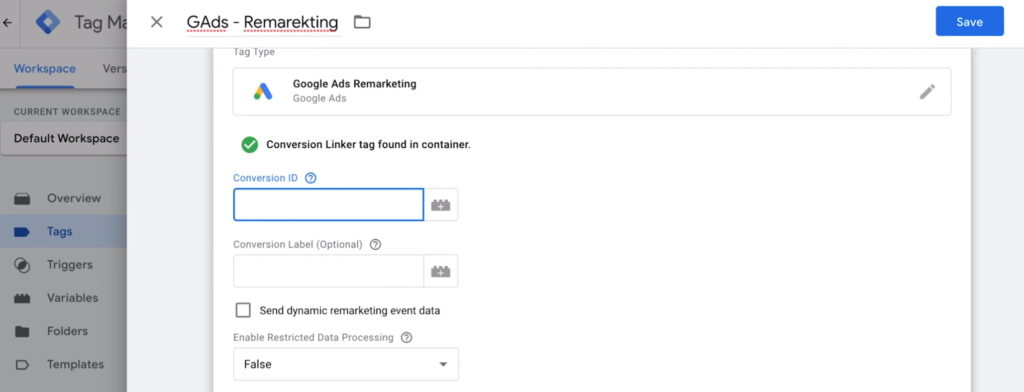
Now we need to go to Google Ads Manager to find out Conversion ID.
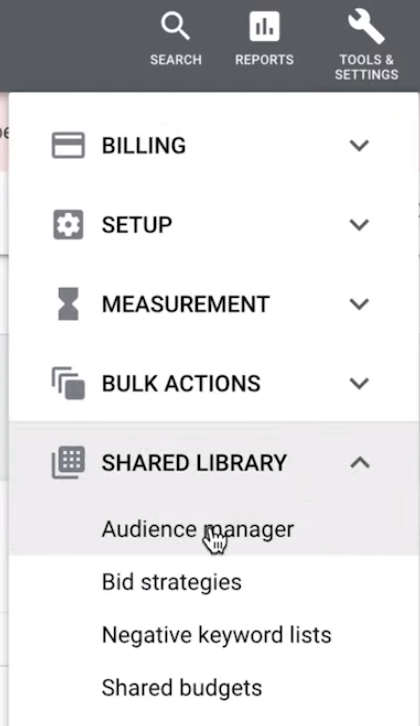
In the interface of Google Ads Manger, click “Tools & Settings” on the top, click “Schared Library → Audience Manager”.
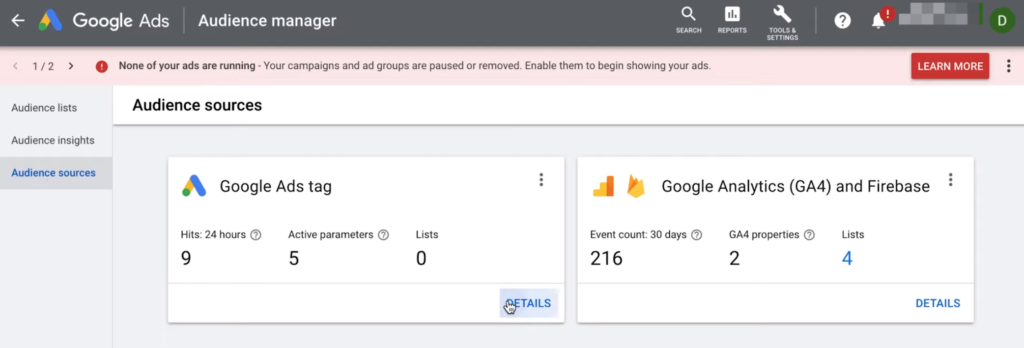
Then choose “Audience Sources” on the left side and click “Details” as follows.
At the bottom of the page, click “Tag Setup”.
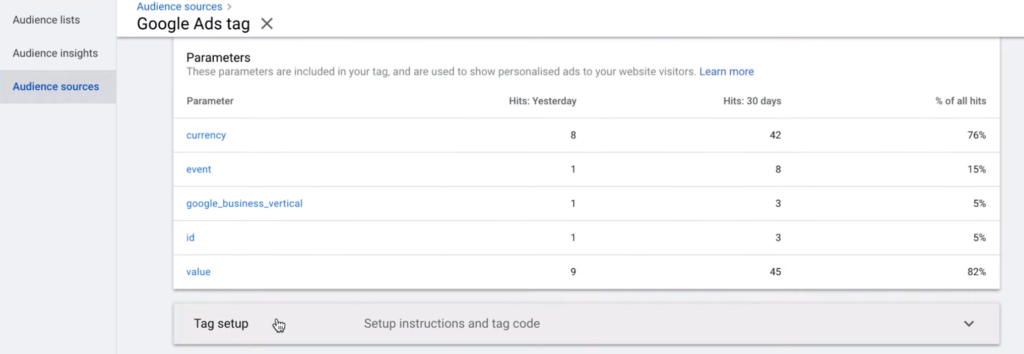
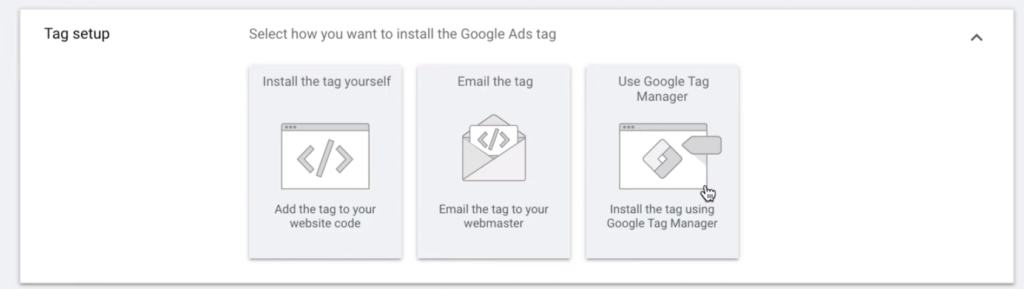
Simply copy the Conversion ID to Google Tag Manager.
Pull Event Data From the Data Layer
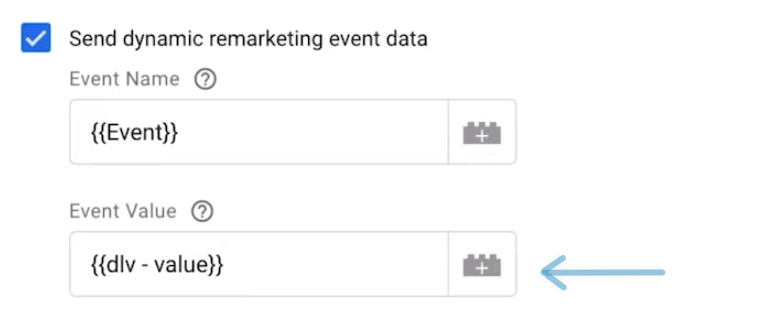
To set up our Tag we also need information like Event Name, Event Value, and Event Items.
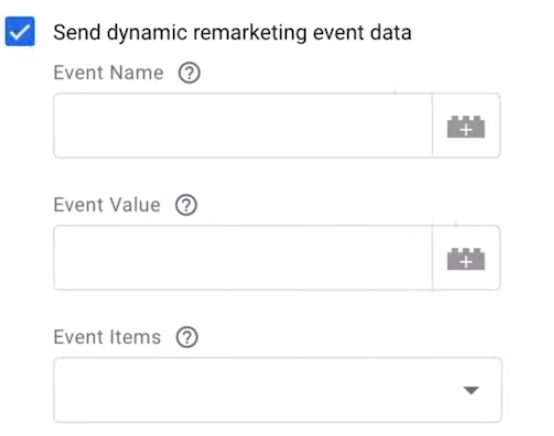
Event Name :
In this example, we already have predefined event names given in the Google documentation that we need to match in order to pull the correct information.

Click on the “+” icon to add a new Event Name.
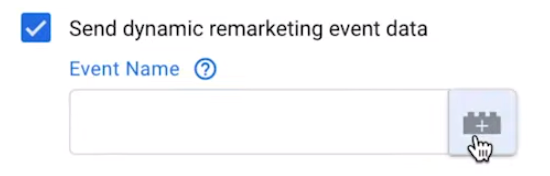
Choose the predefined variable Event, which appears with a gear icon.

Event Value:
Click on the “+” icon to add a new Event Value.
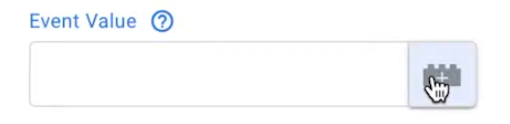
Then choose “Data Layer Variable”.
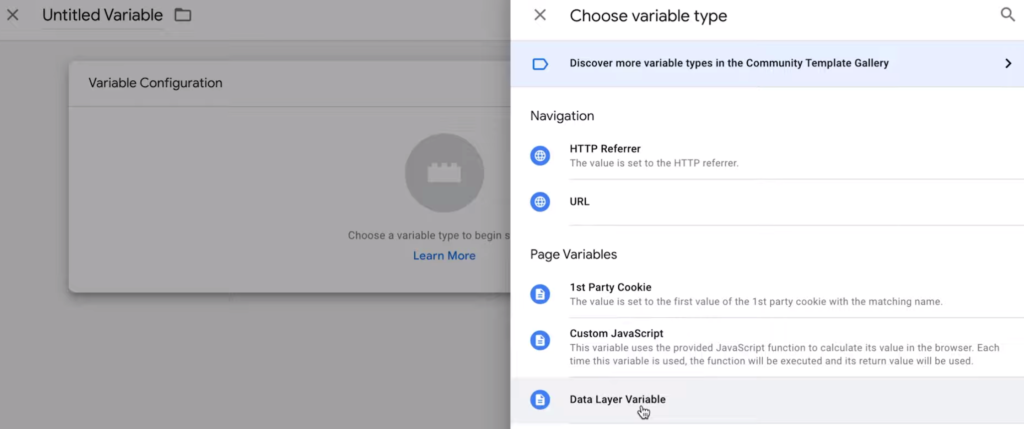
Input “value” as Data Layer Variable Name.

Then name the variable and save it.
Event Items:
Same as Event Value, we also need to create a new “Data Layer Variable”, then input “items” as Data layer Variable Name. The last step it also the same, just give the variable a name and save it.

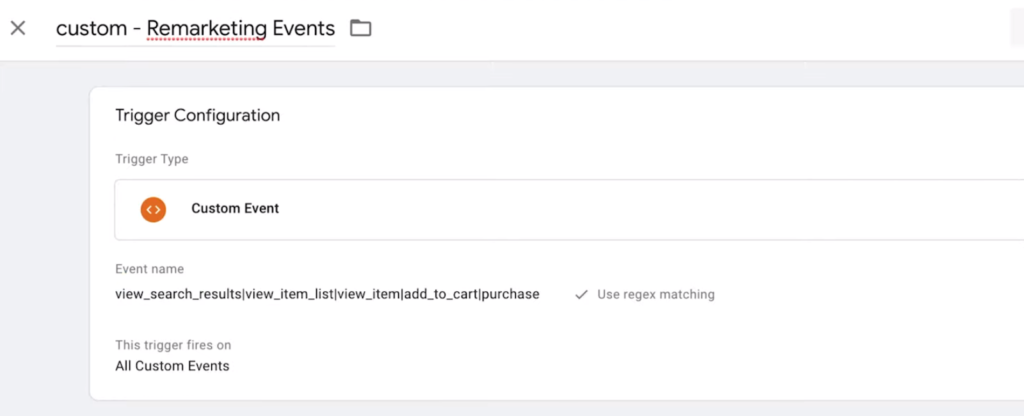
Connect to a trigger
We want to fire our remarketing Tag when someone views a product, searches a product, views a category list, adds a product to their cart, or makes a purchase. This means that we need to trigger our Tag only when these predefined events occur. So let’s create a new Custom Event trigger which fires on multiple events.
We’ll copy all our predefined event names from the Google documentation and separate them with “|”. “|” is one of the regex matching options, which means “or”. Regex matching options can be very handy sometimes so be sure to check it out.
So the final event will be “view_search_results|view_item_list|view_item|add_to_cart|purchase”.
Don’t forget to save the tag and finally we can call it a day!
That’s how we set up dynamic remarketing ads on any website using Google Ads and Google Tag Manager.
This is considered one of the most effective methods to bring customers back to your website because it shows them personalized ads about products and services they want.
In conclusion, setting up Google Analytics Ecommerce Tracking for your Shopify store using Google Tag Manager and Google Ads is a powerful way to gain valuable insights into your store’s performance. By tracking key performance metrics such as revenue, conversion rates, and more, you can make data-driven decisions to improve your marketing efforts and drive more sales. We hope this guide has been helpful in showing you how to set up and use these tools. Remember to keep a close eye on your analytics data, and continue to make adjustments as needed to optimize your store’s performance. In the future article we will show you how to track the conversion of customers who actually purchased your product since it’s very beneficial.
3 Responses
I’m really enjoying the design and layout of your site.
It’s a very easy on the eyes which makes it
much more enjoyable for me to come here and visit more often. Did you hire out a designer to create your
theme? Great work!
I have read so many articles or reviews on the topic
of the blogger lovers but this paragraph is really a pleasant
piece of writing, keep it up.
Hello, i think that i saw you visited my web site thus i came to go back the choose?.I’m attempting to find
things to improve my web site!I assume its adequate to make
use of some of your ideas!!